How to use Mircom ESD Portal
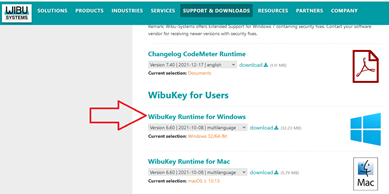
STEP 1: Visit Wibu Systems by clicking this link and download Wibukey Runtime for Windows and install.
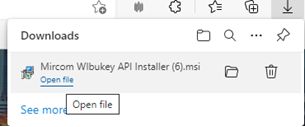
STEP 2: Download Mircom WIbukey API Installer.msi in your preferred browser by clicking this link.
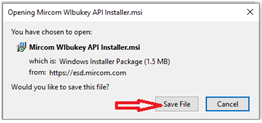
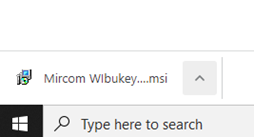
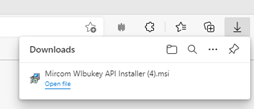
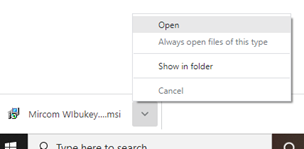
STEP 3: Install the downloaded installer by double-clicking on the Exe. file, or by opening the file (depending on your browser).
STEP 4: Double-click on the new Mircom Wibukey API.exe icon on your desktop to start the API.
STEP 5: The Mircom Wibukey API must be running when accessing and using the Mircom ESD Portal. Click on the ESD Portal link on the API pop-up to open the ESD Portal in your preferred web browser.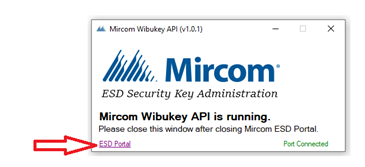
STEP 6: This will bring you to the new Mircom ESD Portal main page. 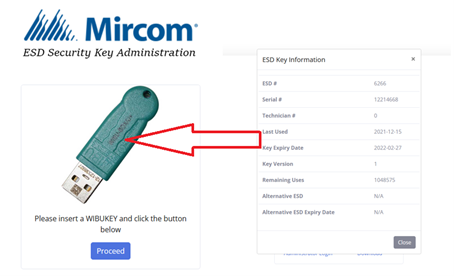
STEP 7: With your key inserted press the Proceed button; you should see the message “API Connection Successful”.
- If a Master Key is inserted you will have the option to login using your Administrator Account, where you will be able to order keys, activate new keys, and manage the keys assigned to your account, and the option to access the Downloads section.
- If a Technician Key is inserted, you will only have the option to access the Downloads section.
- NOTE: Selecting the “Download” link automatically updates the inserted key, if there are any pending updates, before it takes you to the Download section.
STEP 8: You should now see the Dashboard: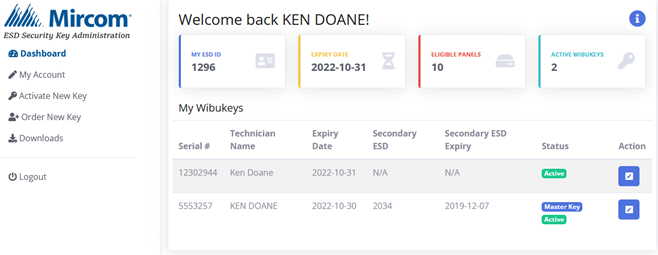
Dashboard:
- Shows your ESD ID number, the expiry date of your account, the Eligible Panels your account allows you to program (hover over the number for the list), and the number of Active WIBUKEYS registered to your account.
- Clicking on the will show you the information for the key currently plugged in.
- The My Wibukeys list shows all your WIBU keys and the current information that is assigned to them. Please remember that the keys need to be updated to have the information written to them. Click on the Action icon to modify the key information (see below).
My Account:
- Allows you to view and update your contact information.
- Email Address is the email address used for logging in. It is also the email used by any automated messages the system needs to email.
- Company Name cannot be edited. Contact the Training Department ([email protected]) if you feel this needs to be updated.
- Mother’s Maiden Name is used by the password recovery.
- Click on Update to save any changes made.
- Update Password allows you to change the password of the account. You need to enter the new password twice to prevent misspellings. Click on Update to save the change.
Activate New Key:
- Will register a new key you have received with the account.
Order New Key:
- Will bring up the order form for new keys. You will need to have a purchase order number ready to fill in.
Downloads:
- Will take you to the download page where you can get the latest configurators and firmware for the panels the WIBU key is used for. This is the same page the Download option form the main screen will take you as well.
Logout:
- Will log you out of the portal, all changes made will be automatically saved.
My Wibukeys, Action:
- Press the Action icon to bring up the key edit window:
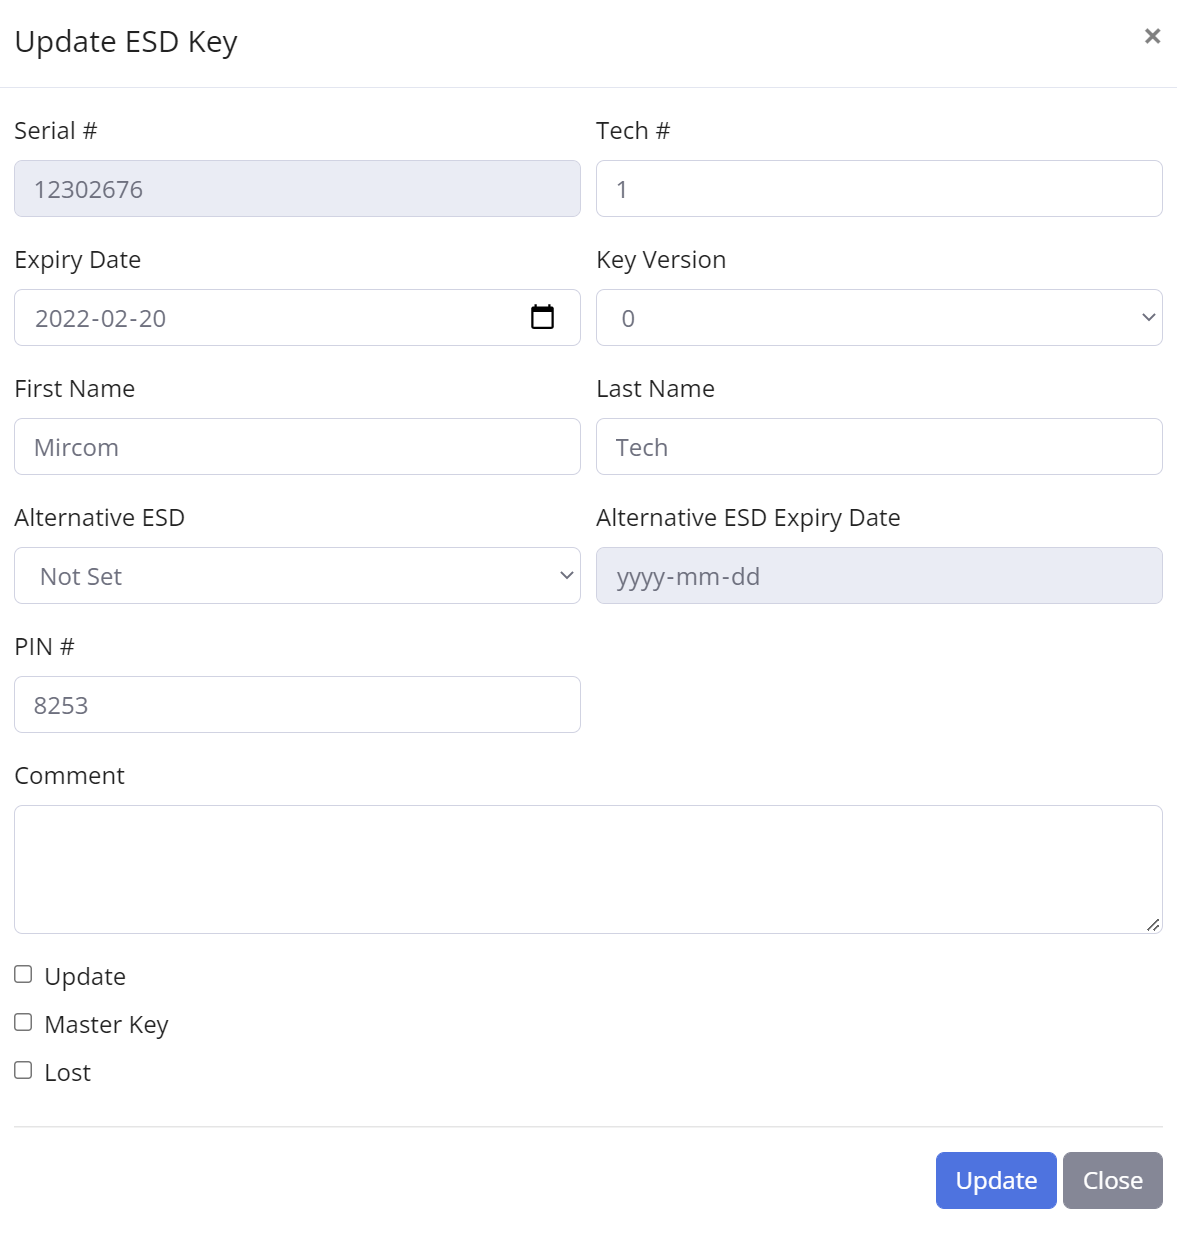
- The Serial # is fixed and cannot be changed.
- The Tech # (technician number) is assigned sequentially to each key as new ones are registered with the account.
- The Expiry Date is when the key will stop working. This can be any day up to the day your account expires. This allows you to have a shortened expiry on a key for your own administrative purposes.
- Key Version, this should always be “1” unless you need to program a FleX-Net version 10 panel. Your account will need to allow access to this panel to allow you to choose version 0 for the programming of these panels.
- First and Last Names allow you to identify the technician that has this key.
- Alternate ESD and Alternative ESD Expiry Date are used when taking over a panel originally installed by another company. These are assigned to your account by Mircom and require an ESD Waiver to be completed and signed.
- While you can have multiple alternate ESD’s available on your account, only one can be assigned to any one key.
- Comment is where you can store notes for later reference.
- Update checkbox: check this to have the key automatically updated the next time it is used to login to the ESD web site.
- Master checkbox: check this to have this key be used to access the Administration area. You can have multiple master keys. This would be the normal situation if you have offices in multiple cities.
- Lost checkbox: check this if they key has been lost or stolen. The next time the key logs into the ESD web site it will be updated so that it no longer valid. If you find the key, you can uncheck this flag to allow it to be used again.
- Update button: click this to save the changes to the ESD web site for later update to the key.
- Close button: clicking this will cancel any changes made.
If you are having an issue, please contact Technical Support at 1-888-647-2665 for help.